The Print Dialog |
| The Print Dialog establishes a conversation with the user to request a printer. When the user selects the printer, the dialog ends and sends the document to the specified printer. El Diálogo de Impresión establece una conversación con el usuario para solicitar una impresora. Cuando el usuario selecciona una impresora, el diálogo termina y envía el documento a la impresora especificada. |
The Print Preview Dialog |
| The Print Preview dialog establishes a conversation so that the user can see a document in the screen before printing it. El Diálogo de Vista Previa establece una conversación de tal forma que el usuario pueda ver un documento en la pantalla antes de imprimirlo. |
Win::PrintConnector |
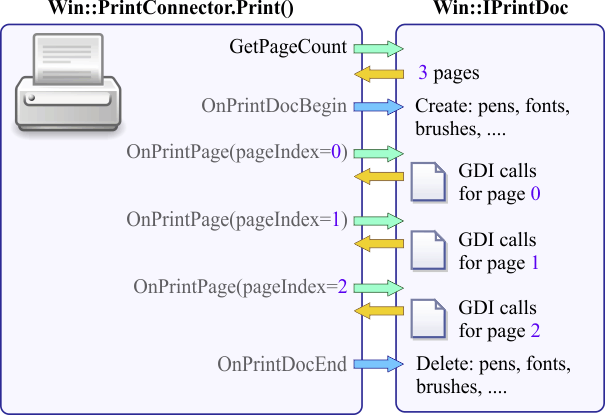
| To simplify the use of the printer, Wintempla provides the Win::PrintConnector class. This class requires an object that implements the Win::IPrintDoc interface. The diagram below shows how this class works. First, the PrintConnector requests the number of pages that the document has, in this case the document has three pages. Second, the PrintConnector calls the OnPrintDocBegin function to indicate that the document is about to be sent to the printer. Third, the PrintConnector calls the OnPrintPage function for each in the document. Finally, the PrintConnector calls the OnPrintDocEnd function to indicate the end of the printing process. Para simplificar el uso de la impresora, Wintempla proporciona la clase Win::PrintConnector. Esta clase requiere un objeto que implemente la interface Win::IPrintDoc. El diagrama de abajo muestra cómo trabaja esta clase. Primero, el PrintConnector solicita el número de páginas que tiene el documento, en este caso el documento tiene tres páginas. Segundo, el PrintConnector llma la función OnPrintDocPage para indicar que el documento está por enviarse a la impresora. Tercero, el PrintConnector llama la función OnPrintPage por cada página en el documento. Finalmente, el PrintConnector llama la función OnPrintDocEnd para indicar el final del proceso de impresión. |
| Problem 1 |
| Create a Wintempla dialog application called ThreePages to create a document with three pages using Win::PrintConnector. In order to use this class, you need to implement the functions of the Win::IPrintDoc interface. Additionally, you must edit the beginning of the class adding private Win::IPrintDoc as it shown below in the ThreePages.h file. After creating the application, insert a Button called btPrint. Cree una aplicación de diálogo de Wintempla llamada ThreePages para crear un documento con tres páginas usando Win::PrintConnector. A fin de usar esta clase, usted necesita implementar las funciones de la interface Win::IPrintDoc. Adicionalmente, usted debe editar el inicio de la clase agregando private Win::IPrintDoc como se muestra debajo en el archivo ThreePages.h. Después de crear la aplicación, inserte un botón llamado btPrint. |
| ThreePages.h |
| #pragma once //______________________________________ ThreePages.h #include "Resource.h" class ThreePages: public Win::Dialog, private Win::IPrintDoc { public: ThreePages() { } ~ThreePages() { } //________________________________ Win::IPrintDoc int GetPageCount(const Win::PrintDocInfo& pdi); bool OnPrintPage(CG::Gdi& gdi, const Win::PrintDocInfo& pdi); void OnPrintDocBegin(CG::Gdi& gdi, const Win::PrintDocInfo& pdi); void OnPrintDocEnd(CG::Gdi& gdi); ... }; |
| ThreePages.cpp |
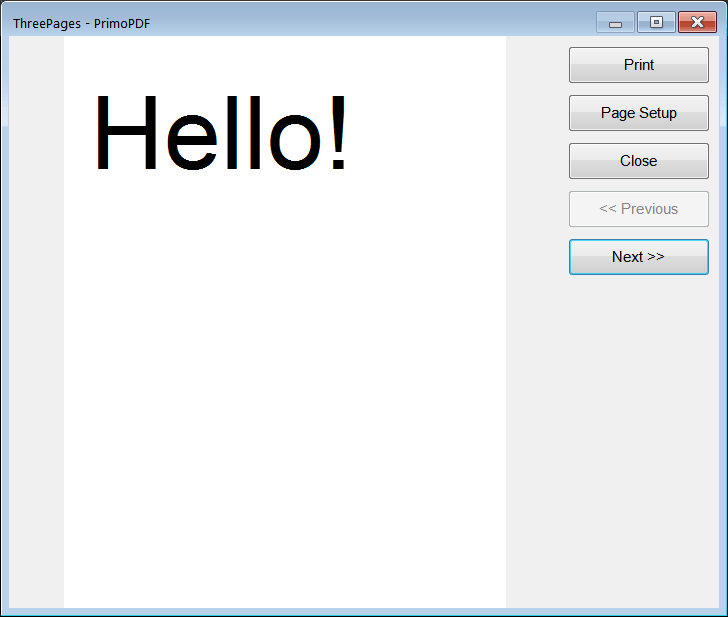
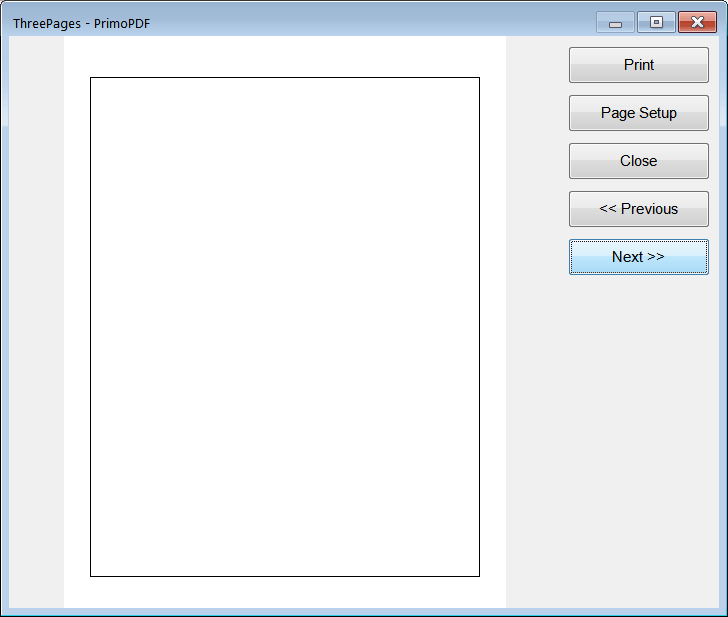
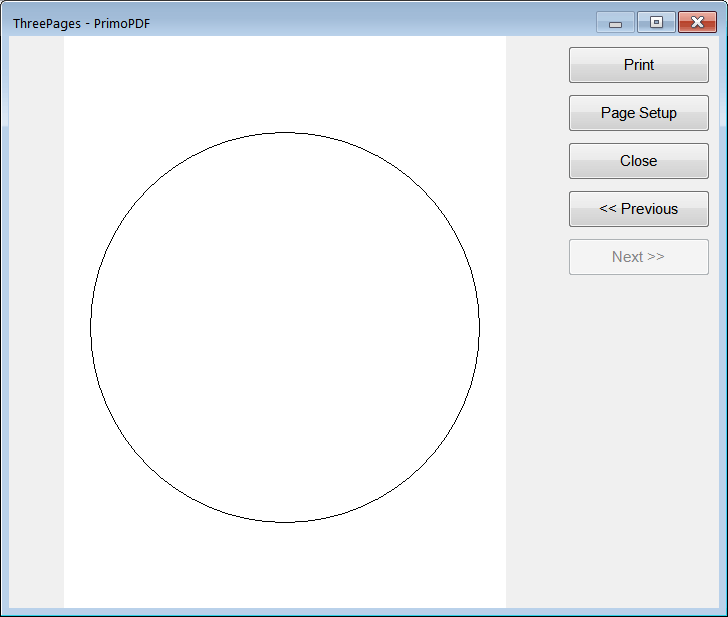
| ... void ThreePages::Window_Open(Win::Event& e) { } void ThreePages::btPrint_Click(Win::Event& e) { Win::PrintConnector printConnector; printConnector.Print(hWnd, L"ThreePages", *this); } int ThreePages::GetPageCount(const Win::PrintDocInfo& pdi) { return 3; } bool ThreePages::OnPrintPage(CG::Gdi& gdi, const Win::PrintDocInfo& pdi) { if (pdi.pageIndex == 0) { CG::Font font(L"Arial", (int)(5*pdi.dots_per_cm+0.5)); // a 5 cm font gdi.Select(font); gdi.TextOut(0, 0, L"Hello!"); } else if (pdi.pageIndex == 1) { gdi.Rectangle(0, 0, pdi.printArea_millicm.cx, pdi.printArea_millicm.cy); } else if (pdi.pageIndex == 2) { const int radius = MINIMUM (pdi.printArea_millicm.cx/2, pdi.printArea_millicm.cy/2); gdi.Circle(pdi.printArea_millicm.cx/2, pdi.printArea_millicm.cy/2, radius); } return true; } void ThreePages::OnPrintDocBegin(CG::Gdi& gdi, const Win::PrintDocInfo& pdi) { } void ThreePages::OnPrintDocEnd(CG::Gdi& gdi) { } |
MultipartDocument |
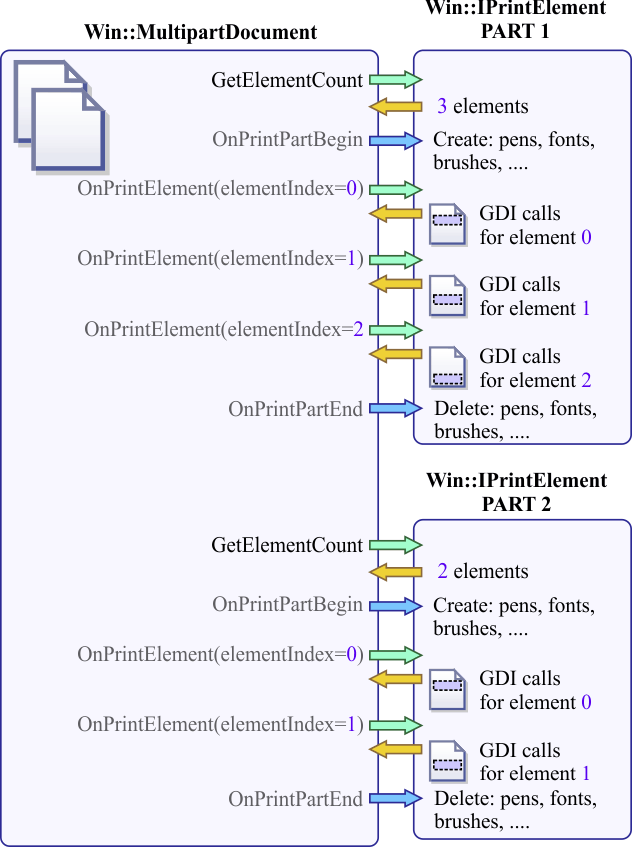
| Wintempla provides the Win::MultipartDocument class to simplify the creation of multipart documents. Any object that implements the Win::IPrintElement interface can be inserted in a multipart document. The figure below shows how this class works when the document has two parts. The first part has three elements, while the second part hast two elements. For instance, a list view control can be a part in a multipart document and each item (row) in the list view control can be an element. Wintempla proporciona la clase Win::MultipartDocument para simplificar la creación de documentos con múltiple partes. Cualquier objeto que implementa la interface Win::IPrintElement puede ser insertado en un documento de múltiple partes. La figura de abajo muestra como esta clase trabaja, cuando el documento tiene dos partes. La primera parte tiene tres elementos, mientras que la segunda parte tiene dos elementos. Por ejemplo, un control de list view puede ser una parte en un documento de parte múltiples y cada item (renglón) en el control de list view control puede ser un elemento. |
A Simple Document |
| The XY Graph control, the Bar Chart control, the Polar Chart control, the Pie Chart control, the Textbox control and the ListView control implement the Win::IPrintElement interface. Thus, in most cases a simple document can be created using GUI elements as shown in the problem below. El control de XY Graph, el control de Bar Chart, el control de Polar Chart, el control de Pie Chart, el control de Textbox y el control de ListView implementan la interface Win::IPrintElement. Así, en la mayoría de los casos un documento simple puede ser creado usando elementos GUI como se muestra en los problemas de abajo. |
| Problem 2 |
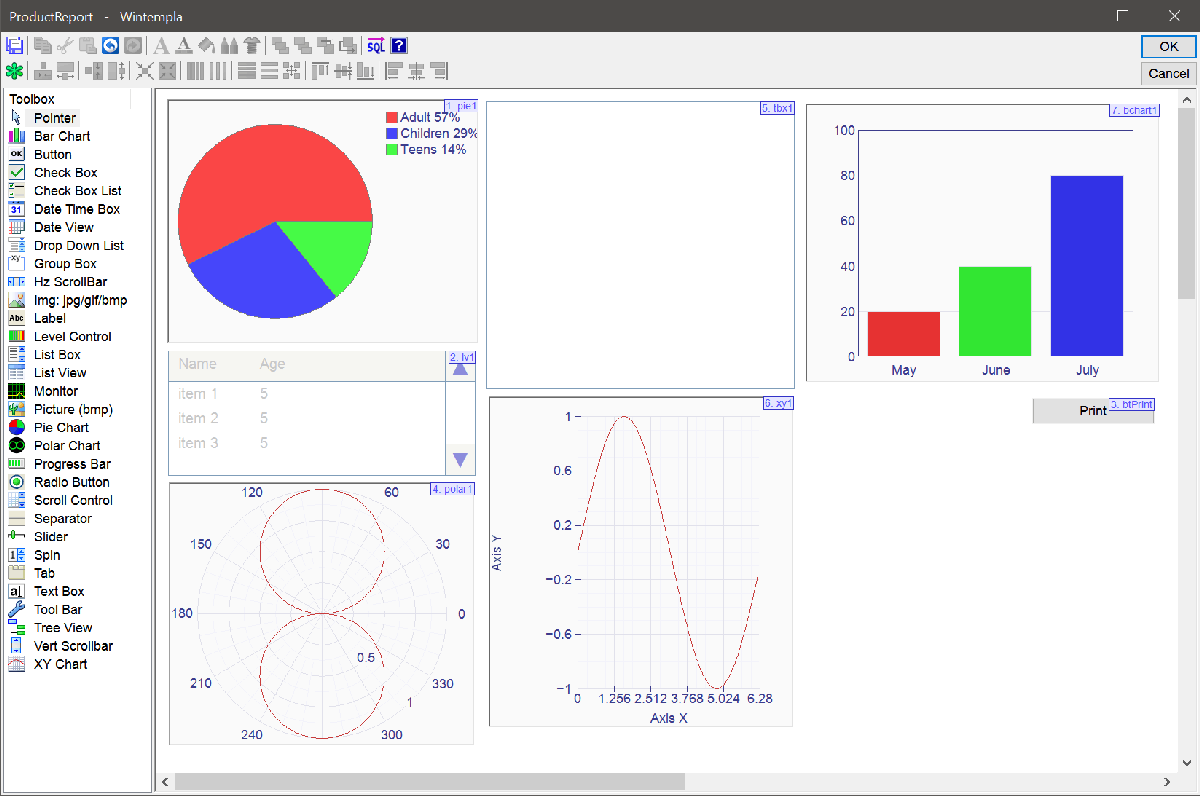
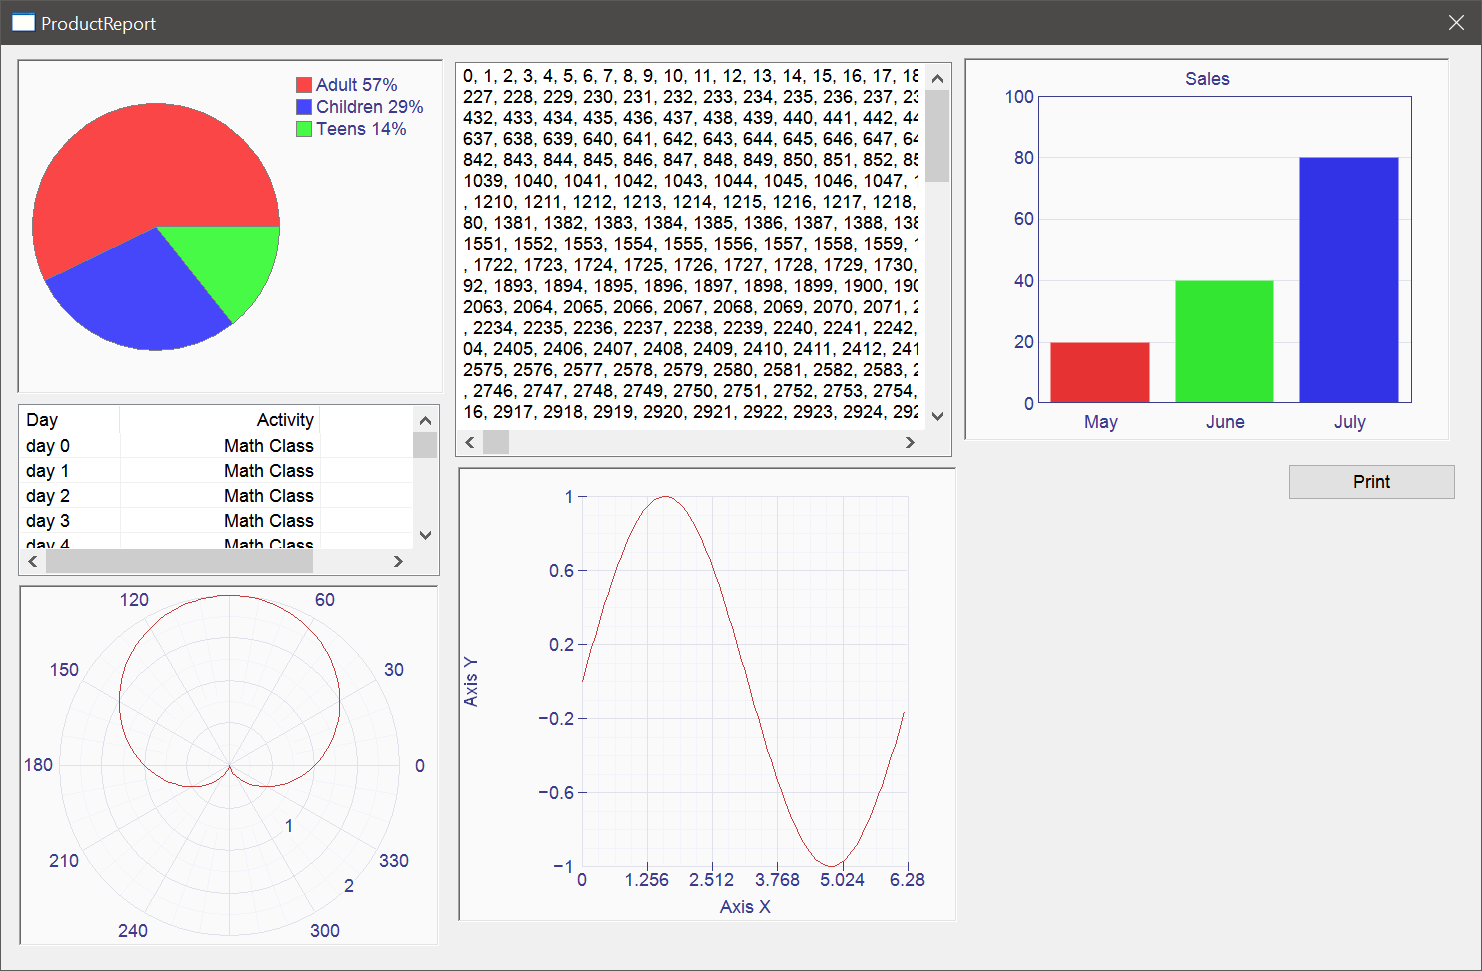
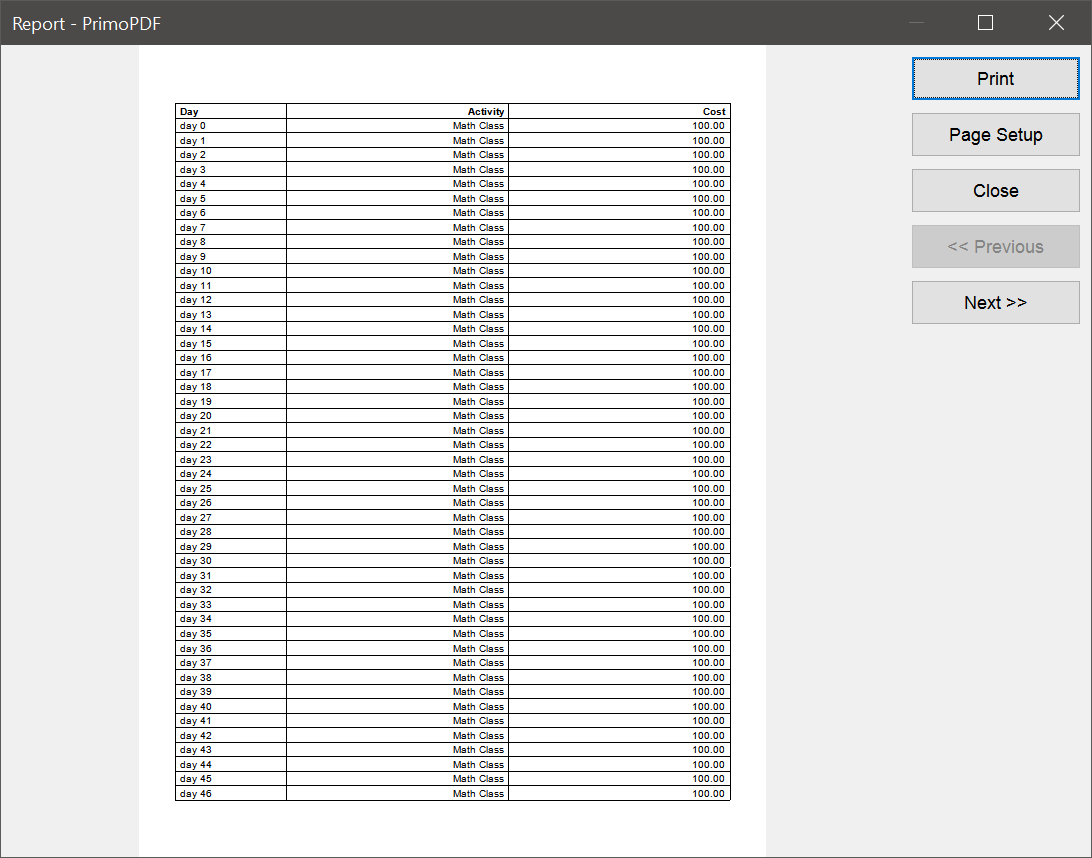
| Create a Wintempla dialog application called ProductReport. Insert: a print button, a Pie Chart, a List View, a Polar Chart, a Textbox, a XY graph and a Bar Chart as shown. The document will have around 42 pages. Cree una aplicación de Dialogo de Wintempla llamada ProductReport. Inserte: un botón para imprimir, un Pie Chart, un List View, una Polar Chart, una Textbox, ana XY graph y una Bar Chart como se muestra. El documento tendrá alrededor 42 páginas. |
| ProductReport.cpp |
| ... void ProductReport::Window_Open(Win::Event& e) { wchar_t text[64]; int i; //________________________________________________________ pie1 pie1.Pies.Add(L"Adult", RGB(250, 70, 70), 200.0); pie1.Pies.Add(L"Children", RGB(70, 70, 250), 100.0); pie1.Pies.Add(L"Teens", RGB(70, 250, 70), 50.0); //________________________________________________________ lv1 lv1.Cols.Add(0, LVCFMT_LEFT, 100, L"Day"); lv1.Cols.Add(1, LVCFMT_RIGHT, 200, L"Activity"); lv1.Cols.Add(2, LVCFMT_RIGHT, 200, L"Cost"); for (i = 0; i < 100; i++) { _snwprintf_s(text, 64, _TRUNCATE, L"day %d", i); lv1.Items.Add(i, text); lv1.Items[i][1].Text = L"Math Class"; lv1.Items[i][2].Text = L"100.00"; } //________________________________________________________ polar1 polar1.Graphs.Add(128); for(int i=0; i<128; i++) { double angle = i*2*M_PI/(128-1); polar1.Graphs[0][i].x = angle; polar1.Graphs[0][i].y = 1.0 + sin(angle); //radius } polar1.SetRadius(0.0, 2.0); polar1.Refresh(); //_______________________________________________________ tbx1 wstring content; for (i = 0; i < 10000; i++) { _snwprintf_s(text, 64, _TRUNCATE, L"%d, ", i); content += text; } tbx1.Text = content; //________________________________________________________ xy1 xy1.CaptionX = L"Axis X"; xy1.CaptionY = L"Axis Y"; xy1.MinX= 0.0; xy1.MaxX= 6.28; xy1.MinY= -1.0; xy1.MaxY= 1.0; xy1.Graphs.Add(100); for(int i=0; i<100; i++) { xy1.Graphs[0][i].x = i*6.28/100; xy1.Graphs[0][i].y = sin(i*6.18/100); } //xy1.Graphs[0].Color = RGB(0, 0, 255); //xy1.Graphs[0].Type = Win::Graph::circle; //xy1.Graphs[0].Caption = L"My Function"; xy1.RefreshAll(); //________________________________________________________ bchart1 bchart1.Bars.Add(L"May", RGB(230, 50, 50), 20.0); bchart1.Bars.Add(L"June", RGB(50, 230, 50), 40.0); bchart1.Bars.Add(L"July", RGB(50, 50, 230), 80.0); bchart1.MaxY = 100.0; bchart1.Text = L"Sales"; } void ProductReport::btPrint_Click(Win::Event& e) { //________________________________________________ Build the document Win::PrintSeparator separator; Win::MultipartDocument doc; doc.Create(); //____________________________________________________ 1. List View doc.AddPart(500, lv1); // 500 milli centimeters = 0.5 cm each row doc.AddPart(500, separator); //____________________________________________________ 2. Pie doc.AddPart(10000, pie1); // 10000 milli centimeters = 10 cm doc.AddPart(500, separator); //____________________________________________________ 3. Polar Graph doc.AddPart(8000, polar1); // 8000 milli centimeters = 8 cm doc.AddPart(500, separator); //____________________________________________________ 4. Textbox doc.AddPart(500, tbx1); // 0.5 cm each row doc.AddPart(500, separator); //____________________________________________________ 5. XY Graph doc.AddPart(6000, xy1); // 6 cm doc.AddPart(500, separator); //____________________________________________________ 6. Textbox doc.AddPart(500, tbx1); // 500 milli centimeters = 0.5 cm each row doc.AddPart(500, separator); //____________________________________________________ 7. Barchart doc.AddPart(10000, bchart1); // 10000 milli centimeters = 10 cm doc.AddPart(500, separator); //____________________________________________________ 8. Textbox doc.AddPart(500, tbx1); // 500 milli centimeters = 0.5 cm each row doc.AddPart(500, separator); //____________________________________________________ 9. List View doc.AddPart(400, lv1); // 400 milli centimeters = 0.4 cm each row doc.AddPart(500, separator); //____________________________________________________ 10. Pie doc.AddPart(4000, pie1); // 4000 milli centimeters = 4 cm doc.AddPart(500, separator); //________________________________ Print the document Win::PrintConnector printConnector; printConnector.Print(hWnd, L"Report", doc); } |
Images |
| As the resolution of a printer is higher that the resolution of the screen. It is not recommended to use the image formats: BMP, JPG, PNG, GIF, etc., for high quality documents. The recommended format is enhanced metafile (EMF) which can be in the local hard drive, or be included in the main program as a resource. Como la resolución de la impresora es más alta que la resolución de la pantalla. No se recomienda usar los formatos de imagen: BMP, JPG, PNG, GIF, etc. para documentos de alta calidad. El formato recomendado es "enhanced metafile" (EMF) el cual puede estar en un archivo en el disco duro o estar incluido dentro del programa principal como un recurso. |
A Document |
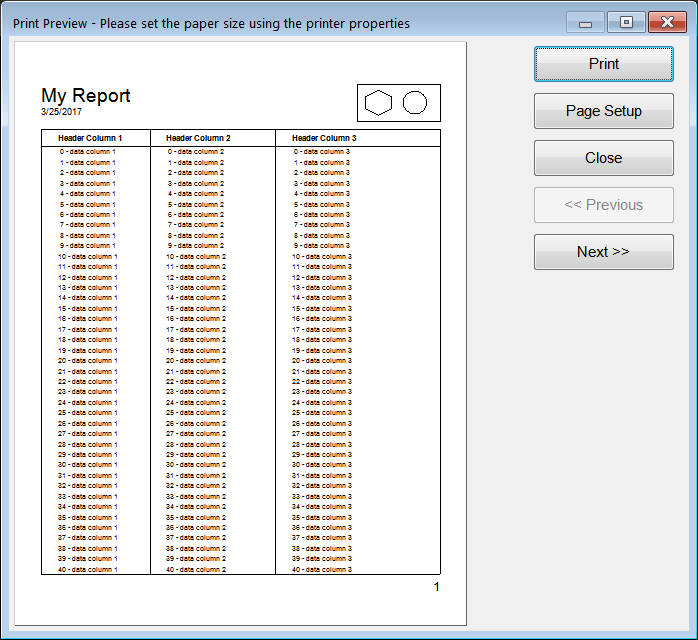
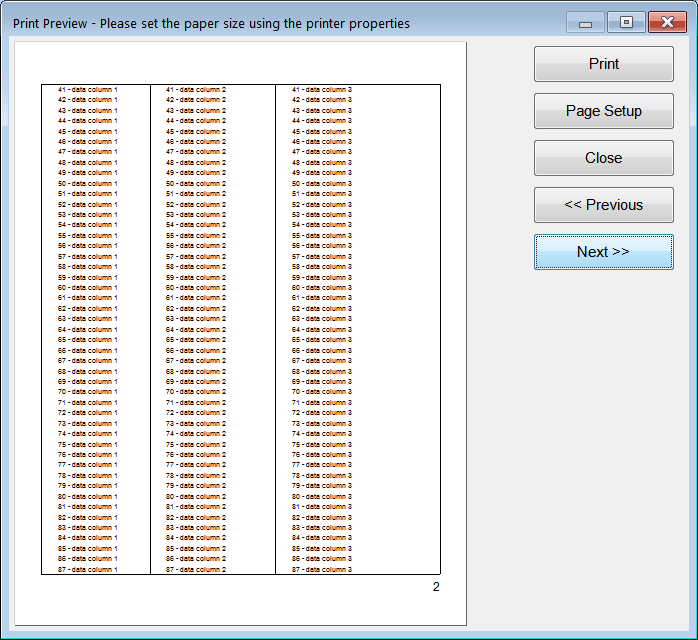
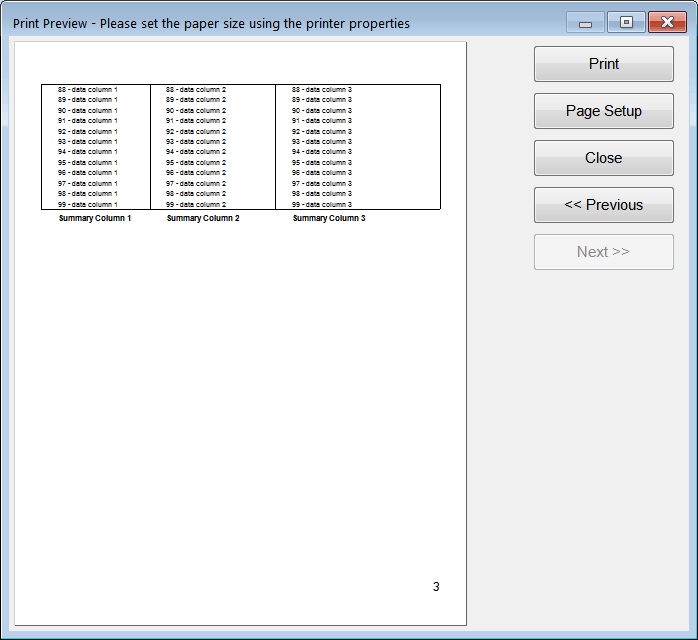
| It is possible to add a new document to a project using the menu: Tools > Add Wintempla Item... > Document. This type of document uses GDI to create the document as it is illustrated in the following problem. Es posible agregar un nuevo documento a un proyecto usando el menú: Tools > Add Wintempla Item... > Document . Este tipo de documento utiliza GDI para crear el documento como se ilustra en el siguiente problema. |
| Problem 3 |
| Create a Wintempla dialog application called Information to create a custom document pages using the Win::MultipartDocument class. After creating the application, insert a Button called btPrint. Cree una aplicación de diálogo de Wintempla llamada Information para crear un documento personalizado usando la clase Win::MultipartDocument. Después de crear la aplicación, inserte un botón llamado btPrint. |
| Step A |
| Insert a Document: Tools > Add Wintempla Item... > Document ; set the name to Report and click the Add button. The Wizard will create two files: Report.h and Report.cpp. There are four classes in the report: Report::Header, Report::Footer, Report::Data and Report::Summary. All these classes implement the Win::IPrintElement interface. The Report::AddPart function inserts the several elements of the document. Inserte un Document: Tools > Add Wintempla Item... > Document ; fije el nombre en Report y haga clic en el botón de Add. El Asistente creará dos archivos: Report.h y Report.cpp. Hay cuatro clases en el reporte: Report::Header, Report::Footer, Report::Data y Repor::Summary. Todas estas clases implementar la interface Win::IPrintElement. La función Report::AddPart inserta los distintos componentes del documento. |
| Step B |
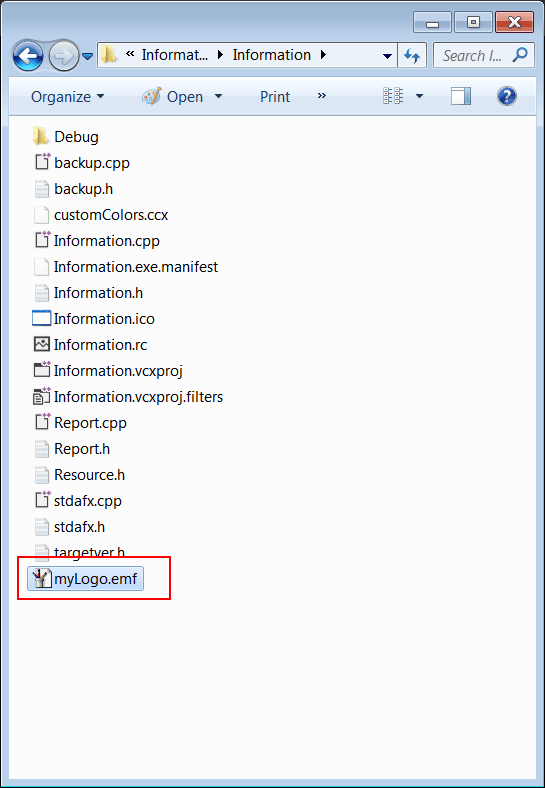
| The report requires a Metafile logo (myLogo.emf). You can create an EMF file using Corel Draw, Adobe Illustrator, Inkscape or any other software that can create a vector image. A vector image is recommended for high quality documents. After creating the file, you can locate the file on the folder of your project. El reporte require de un Logo en Metafile (myLogo.emf). Usted puede crear un archivo EMF usando Corel Draw, Adobe Illustrator, Inkscape o algún otro programa para crear una imagen vectorial. Una imagen vectorial es recomendada para documentos de alta calidad. Después de crear el archivo, usted puede colocar el archivo en la carpeta de su proyecto. |
| Step C |
| Edit the files: Information.h and Information.cpp Edite los archivos: Information.h y Information.cpp |
| Information.h |
| #pragma once //______________________________________ Information.h #include "Resource.h" #include "Report.h" class Information: public Win::Dialog { public: Information() { } ~Information() { } ... }; |
| Information.cpp |
| ... void Information::Window_Open(Win::Event& e) { } void Information::btPrint_Click(Win::Event& e) { Report report; report.Print(hWnd); } |
